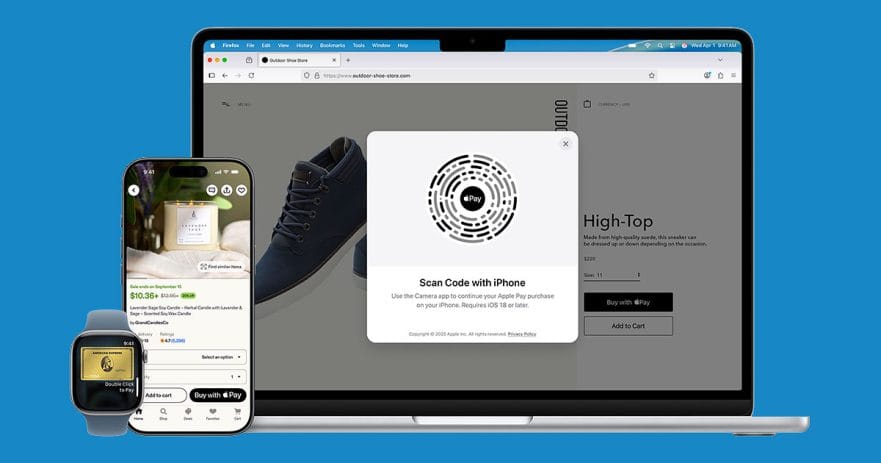
After years of watching tourists casually tap their iPhones at local checkout counters, Apple Pay has finally arrived for users in the Philippines.

Visa briefly let the cat out of the bag on Monday, Aug. 3, with a prematurely published (and swiftly deleted) press release, and citizens quickly picked up the scent. But despite the lack of a grand announcement from Cupertino at the time of writing this article, the digital wallets are already waking up. The service is actively live right now.

SEE ALSO: Google Wallet now in the Philippines. Here’s your guide to using it
The rollout appears to be in its early stages. Banks like Metrobank and GoTyme are already confirmed to be working, with users successfully adding their physical and virtual debit cards to the Apple Wallet since yesterday. However, not every local credit or debit card is playing nice just yet. We’ll publish the full list of supported Philippine banks and issuers as soon as Apple officially updates its regional directory.
For a country that has heavily embraced QR-code digital wallets like GCash and Maya, the arrival of Apple Pay introduces a frictionless alternative. There is no need to open an app, wait for a camera to focus on a barcode, or wait for an SMS confirmation. It relies on Near Field Communication or NFC technology, so if a store’s payment terminal has the universal contactless symbol (that sideways Wi-Fi icon), it should take Apple Pay.
Here is everything you need to know to get your digital wallet up and running.
How to set up Apple Pay on your iPhone
The setup process is baked directly into iOS, so you don’t need to download any new apps.
- Open the Wallet app on your iPhone.
- Tap the “+” button in the upper right corner of the screen.
- Select “Debit or Credit Card.”
- Scan your card using your iPhone’s camera, or manually type in your card details.
- Verify the card with your bank. Depending on your bank, you might be redirected to their mobile app or sent a one-time password or OTP via text to confirm it’s actually you.
Once verified, your card will appear in the Wallet app, and you can start using it immediately. You can repeat this process for the Apple Watch using the Watch app on your iPhone.
How to pay in stores
Using Apple Pay is arguably faster than pulling a physical card out of your real wallet. You don’t even need to wake your smartphone up first.
- Double-click the side button on your iPhone (the power button on the right side).
- Look at your screen to authenticate the purchase with Face ID, or rest your finger on the Home button if you’re using an older iPhone with Touch ID.
- Hold the top of your iPhone near the store’s contactless payment terminal until you see a checkmark and the word “Done” on your screen.
For the Apple Watch, just double-click the side button and hold the display near the terminal until you feel a gentle tap on your wrist.
How to pay online and in apps
In-store tapping is only half the equation. You can also use Apple Pay for online purchases and mobile apps on your iPhone, iPad, or Mac.
When you’re shopping on Safari or using a supported app, you don’t need to manually type in your 16-digit card number, expiration date, or shipping address.
- Tap the Apple Pay button at checkout.
- Review your payment info. If needed, select your preferred card or update your shipping details on screen.
- Authenticate. On an iPhone or iPad, confirm with Face ID, Touch ID, or your passcode. On a Mac with Touch ID, rest your finger on the sensor, or double-click the side button on an Apple Watch synced to your Mac.
While global platforms like Airbnb or Booking.com accept it immediately, you’ll start seeing the Apple Pay button pop up on local e-commerce platforms and delivery apps soon. Major regional payment gateways like Xendit already support Apple Pay backend integrations, meaning Philippine merchants can enable it with relative ease now that the feature is live locally.
The privacy advantage
Beyond the convenience of leaving your leather wallet at home, Apple Pay brings a heavy-hitting security architecture to everyday local transactions.
When you add a card to Apple Pay, your actual credit or debit card number is never stored on the device or on Apple’s servers. Instead, Apple assigns a unique “Device Account Number” that gets encrypted and locked away in the Secure Element — a dedicated, certified chip inside your iPhone designed specifically to hoard payment data.
When you buy a cup of coffee or pay for groceries, your phone hands the terminal that unique device number along with a dynamic, one-time security code. The merchant never sees your actual card number, and if your smartphone is ever lost or stolen, you can instantly lock or wipe the digital wallet via iCloud without having to cancel your physical bank cards.
Learn About This Author